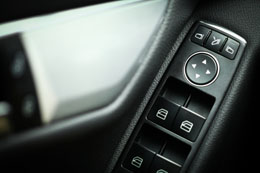
Power windows have proved to be a boon, which has finally replaced mechanically operated windows. Now with just the push of the button, windows can be rolled down or up, all thanks to the power window regulator. However, at times the power window may fail to operate as required, mainly due to some power window regulator problem. These are the times when you may find that your vehicle’s power windows are not working properly or are getting stuck in the middle. Read further for instructions on how to repair and replace a power window regulator in the car. You can complete this task in about a couple of hours, if you follow the instructions properly.
How to Repair the Power Window Regulator
Taking the automobile to a professional for car power window repair can be an expensive affair. So if you can go about the task of repairing it yourself, then it may save you the trip of visiting the mechanic and also on the cost. Here are some guidelines regarding power window regulator repair.
- Before you begin the task of repairing the power window regulator, read the instructions manual carefully, so that you don’t commit any mistake, which may further cause problems. The manual will guide you on the different parts of the power window and how to dismantle and fix it again.
- The power windows work on an automated mechanism that controls the sliding of the window. It is controlled by a motor, powered by the car battery. So before you start your work, disconnect the battery.
- The next task is to remove the door panel, to make your work more hassle free. For this you need to locate the screws in the door panel and unfasten them. The window should be positioned down so that the screws are removed easily.
- With the help of a screwdriver, remove all the screws and window control switches. Keep the screws in such a place that you can reach them and do not have to search for them after completion of the task. Disconnect any wiring from the door panel.
- Disconnect the window panel by prying the clips free that are attaching it to the seam. Begin at the bottom and pave your way upwards around the edges. Lift the panel up and dislodge it from the seam. If there is a button that is connecting the panel, press it so that the panel is released.
- If the problem is only with the slider, then you may have to lubricate the brackets with lithium grease or spray. This will make the sliding of the windows effortless and bring it back to its working condition. Clean the brackets with a brush if you find residual dust and grime, before fixing the window.
- If this is not the problem and the motor needs to be replaced, then continue working further. Remove the plastic vapor barrier carefully so as not to tear it. The rear window may have an extra piece of trim, which should also be dismantled. After this, remove the glass with proper care and mark the place, so that you fix it again correctly.
- Loosen the clamps which are attaching the window. Push the bottom edge to slide the glass in the upward direction and through the door. Now you will be able to see the regulator motor. Disconnect the wiring and harness by removing the bolts and nuts. The bottom regulator nuts can be removed with the help of a wrench. Dismantle the motor completely from the bracket. Replace it with the newly purchased motor and go about the task of fixing the window as before. Connect the battery and check if the power window is sliding properly.
You can diagnose the problem yourself and get the power window regulator repaired. In case you are unable to repair the power window regulator all by yourself, it is better to seek professional help to avoid damaging the motor any further.