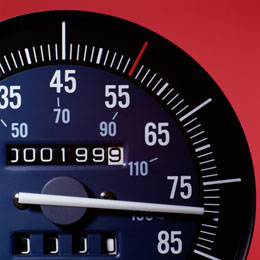
Odometer is the faithful mile counter on your dashboard, that keeps you informed about the distance that your car has covered. Its working is made possible by a gear train, that has an incredible gear ratio of 1690:1. That is substantial gear reduction. It causes the input shaft to make 1690 rotations, to register a mile.
Repairing an Odometer
Considering that the reason for odometer problems is the wearing out of the planetary gear (which is the most common reason), I present the overview of a general repair procedure, involving its replacement. For information, specific to your car model, refer to the appropriate Hayne’s manual.
Mileage Reset Not Possible
Before we go ahead, one thing needs to be made clear. There is no way you can reset the mileage shown by the odometer, through this repair procedure or any other. So you don’t need to worry about causing an accidental resetting.
Be Gentle
This repair job is very delicate work and you need to be very careful, while removing all connected parts and reassembling them together. It is a good idea to spread a white colored cloth over your working space, while you are working on the speedometer gauge. This will serve two purposes. It will be easier to spot the tiny parts of the speedometer gauge and that way, you can make sure that they don’t roll away. The job requires a lot of patience.
Tools and Materials Required
The tools that you will need for the repair are a combination of flat head and Phillips screwdrivers, which will help you in the initial part. You will also need the set of screwdrivers, that are used for computer repair jobs. Other than that, you will have to buy a new odometer planetary gear from the car supplies store, specific to your car model.
Disconnect Negative Terminal of the Car Battery
Before you begin, disconnect the negative terminal of the car battery. First part is the removal of the speedometer gauge. Take hold of the flat head screwdriver and using it, remove the gasket surrounding the circumference of the speedometer gauge.
Remove the Speedometer Gauge Assembly
Gently remove the entire speedometer gauge assembly, out of the dashboard. You need to be slow in doing this, taking care to not disconnect the wires connected to the gauge, from behind.
Look at the back side of the gauge and observe the wire connections made to it. Take a snapshot, if you want, before you go ahead and remove the wire connections. That way, you will remember how to put them back.
Remove the Gauge Out of the Casing
Next part is removing the speedometer gauge, out of its casing. To do that, first put the speedometer gauge face down, on your work surface. Using a Phillips head screwdriver, remove the casing screws. Now, you can remove the core of the gauge, out of its casing and place it on your work area.
Remove Reset Post
Now you must remove the reset post, that is attached to the motor casing, which is a small black colored box at the reverse side of the speedometer gauge. Slowly pry it out, by pressing at the connection point between the post and the motor casing.
Remove the Speedometer Needle
Next job needs to be done very carefully as it involves the removal of the speedometer needle, which is prone to bending, if not handled carefully.
Clutch the base of the needle to remove it, by slowly turning it clockwise until it can turn no more and then pulling it out. You may have to rock it back and forth to remove it.
Now, using the computer repair size Phillips screwdriver, remove the screws situated in the face of the gauge. Proceed to remove the motor casing out of the dial, by pulling it out.
Remove Gear Pod
Next, focus on the motor casing to remove the gear pod, situated at the top of the casing, that is attached to its lid. Observe the pod to locate the planetary gear inside and pry it off, using the mini flat head screwdriver.
Replace Planetary Gear and Reassemble
Then, carefully get the new replacement gear and push it into the position of the old planetary gear. With that, your replacement job is essentially done and now you must begin the reassembly of the whole apparatus, putting every tiny part back in place. Go in exact reverse and retrace your steps to put all the pieces of the gauge back together.
This method of repair will work of course, if the problem lies with the bad planetary gear. If there are other major problems, then it’s best to replace it altogether.